SINGER® Elastic Presser Foot for Sergers
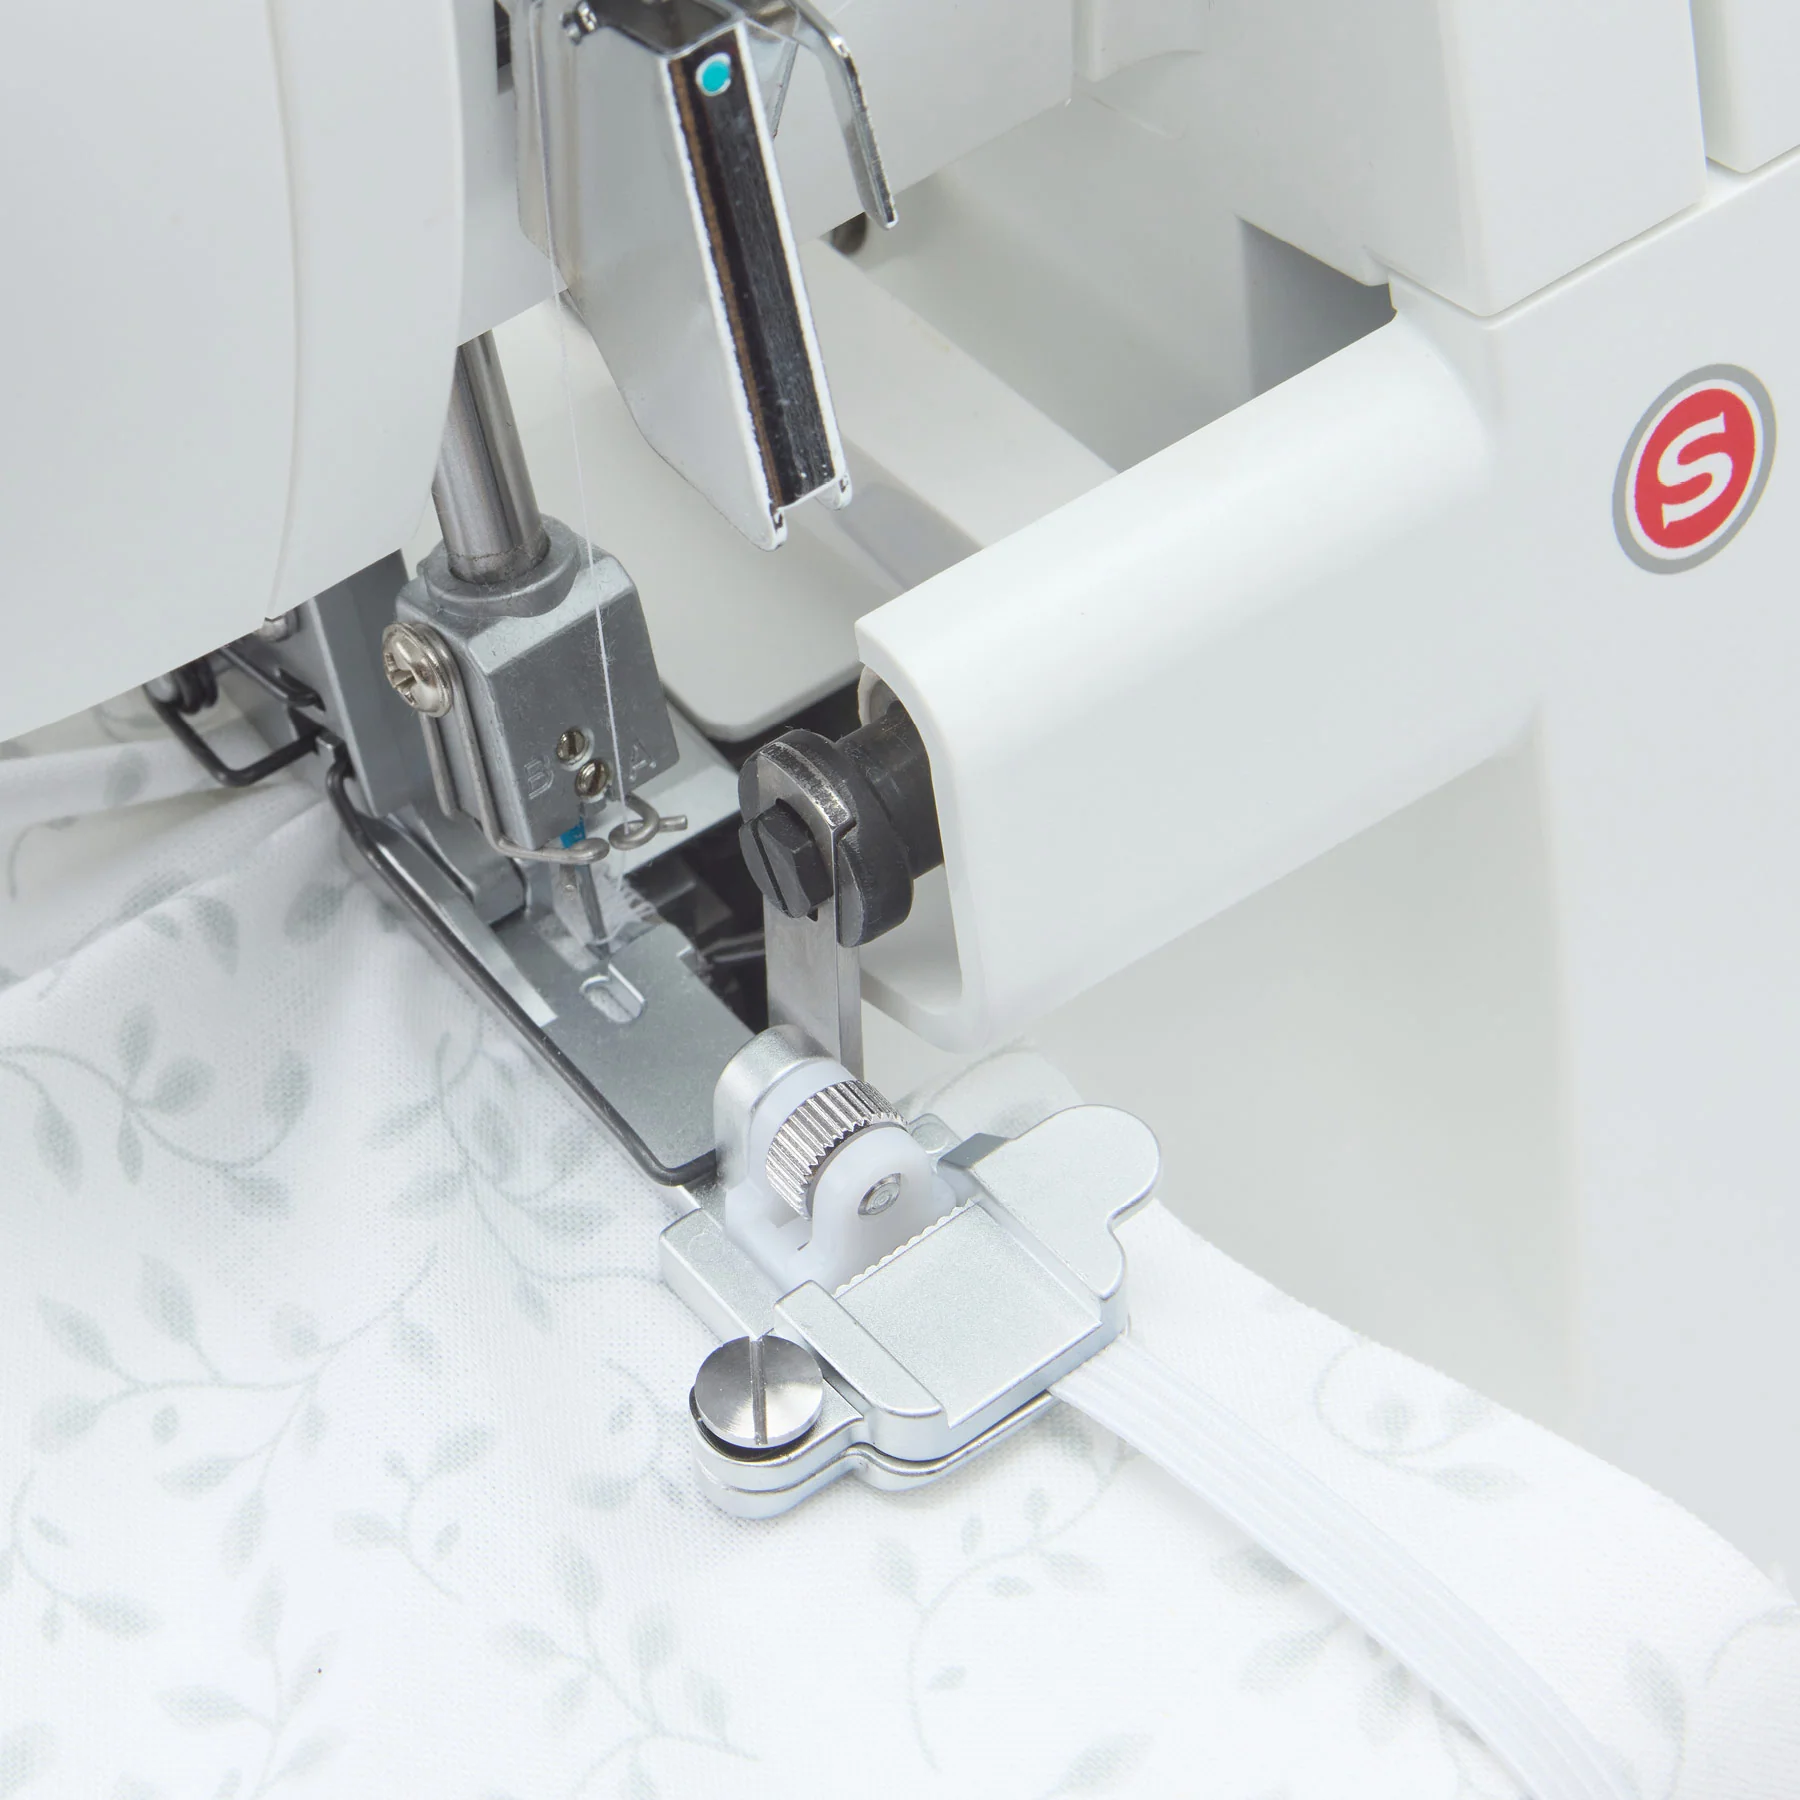
Designed specifically for sergers, the Elastic Foot is used for stretching, inserting and attaching elastic to a project. Adjust the amount of stretch simply by adjusting the screw on the front of the presser foot.
Fits SINGER Sergers with compatibility code SA, including models S0100, HD0450S, HD0405S and 14HD854.
Serger Settings:
Needles: One or two
Stitch Type: Three-thread overlock or four-thread ultra stretch mock safety stitch
Stitch Length: 4
Differential Feed: Normal
Upper Knife: Engaged or disengaged
Instructions:
1. Loosen the screw and pull the guide to the left.
2. Insert the elastic through the opening and pull to the back of the foot.
3. Re-position the guide and tighten the screw.
4. Snap the Elastic Foot to the machine.
5. Adjust the amount of stretch desired with the adjusting screw on the top of the foot.
6. Position the fabric wrong side up under the foot to the desired position.
7. Sew while lightly pulling the elastic to the back of the machine. Be careful not to cut the elastic while stitching.
Product Information
Product Information
Shipping & Returns
Shipping & Returns
SINGER® Elastic Presser Foot for Sergers
SINGER® Elastic Presser Foot for Sergers
Designed specifically for sergers, the Elastic Foot is used for stretching, inserting and attaching elastic to a project. Adjust the amount of stretch simply by adjusting the screw on the front of the presser foot.
Fits SINGER Sergers with compatibility code SA, including models S0100, HD0450S, HD0405S and 14HD854.
Serger Settings:
Needles: One or two
Stitch Type: Three-thread overlock or four-thread ultra stretch mock safety stitch
Stitch Length: 4
Differential Feed: Normal
Upper Knife: Engaged or disengaged
Instructions:
1. Loosen the screw and pull the guide to the left.
2. Insert the elastic through the opening and pull to the back of the foot.
3. Re-position the guide and tighten the screw.
4. Snap the Elastic Foot to the machine.
5. Adjust the amount of stretch desired with the adjusting screw on the top of the foot.
6. Position the fabric wrong side up under the foot to the desired position.
7. Sew while lightly pulling the elastic to the back of the machine. Be careful not to cut the elastic while stitching.
Original: $25.49
-70%$25.49
$7.65Product Information
Product Information
Shipping & Returns
Shipping & Returns
Description
Designed specifically for sergers, the Elastic Foot is used for stretching, inserting and attaching elastic to a project. Adjust the amount of stretch simply by adjusting the screw on the front of the presser foot.
Fits SINGER Sergers with compatibility code SA, including models S0100, HD0450S, HD0405S and 14HD854.
Serger Settings:
Needles: One or two
Stitch Type: Three-thread overlock or four-thread ultra stretch mock safety stitch
Stitch Length: 4
Differential Feed: Normal
Upper Knife: Engaged or disengaged
Instructions:
1. Loosen the screw and pull the guide to the left.
2. Insert the elastic through the opening and pull to the back of the foot.
3. Re-position the guide and tighten the screw.
4. Snap the Elastic Foot to the machine.
5. Adjust the amount of stretch desired with the adjusting screw on the top of the foot.
6. Position the fabric wrong side up under the foot to the desired position.
7. Sew while lightly pulling the elastic to the back of the machine. Be careful not to cut the elastic while stitching.